How To Install A DC Solar Water Pump System?
2024-01-18 10:32:11
What Is DC Solar Water Pump System?
DC Solar Water Pump System is a device that utilizes solar energy to pump water from wells, rivers, lakes, or other sources for irrigation, livestock, and household use. It consists of a solar panel, DC pump, and controller. This eco-friendly system offers a reliable and cost-effective solution for areas without electricity or with unstable power supply.
Installing a DC solar water pump system is an excellent way to provide a reliable and cost-effective water supply to remote locations. These systems are powered by solar panels, making them energy-efficient and environmentally friendly. This article will discuss the steps involved in installing a DC solar water pump system.
7 Steps To Install A DC Solar Water Pump System
1. Choose the Right Location
The first step in installing a DC solar water pump system is choosing the right location. A suitable location should have access to sufficient sunlight for the solar panels to generate power. It is also essential to consider the distance between the pump location and the water source, as this will affect the length of the tubing required. Additionally, ensure that the terrain is suitable for the installation and that the area is not at risk of flooding.
2. Determine Your Water Needs
Before installing a DC solar water pump system, it is crucial to determine your water needs. This will help you choose the right size of the pump and the solar panel required to power it. Factors to consider include the depth of the water source, the total pumping head (which takes into account factors such as the elevation difference and friction losses), and the desired flow rate.
3. Choose Your Equipment
After determining your water needs, the next step is to choose the equipment required for the DC solar water pump system. This includes the water pump, solar panels, and a charge controller. It is essential to select high-quality and efficient equipment that meets your specific requirements.
4. Install the Solar Panels
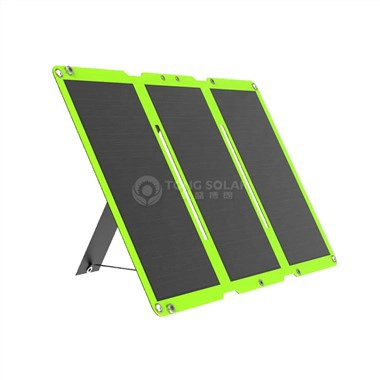
The solar panels are a critical component of a DC solar water pump system as they provide the power required to run the pump. The panels should be installed in an area with maximum exposure to sunlight. Ensure that they are angled correctly and facing south if you are in the northern hemisphere or north if you are in the southern hemisphere. The panels should also be connected to the charge controller using appropriate wiring and connectors.

5. Install the Water Pump
The water pump should be installed near the water source, ideally at the bottom of the well or borehole. It is important to ensure that the pump is securely anchored to prevent it from moving or shifting during operation. The tubing connecting the pump to the solar panel should be the appropriate length to minimize pressure losses and maintain adequate flow rates.
6. Connect the System
After installing the solar panels and water pump, the next step is to connect the system. This involves wiring the solar panels into the charge controller and connecting the pump to the tubing. Ensure that all connections are secure and waterproof.
7. Test the System
Once the system is connected, it is essential to test it to ensure that it is working correctly. Turn on the pump and check the flow rate and water pressure. It is also important to monitor the system for a few days to ensure that it is functioning correctly and providing an adequate water supply.
Conclusion
Installing a DC solar water pump system is a relatively straightforward process that can provide a reliable and cost-effective water supply to remote locations. Careful consideration should be given to choosing the right location, determining your water needs, selecting suitable equipment, and ensuring that the installation is done correctly. By following these steps, you can install a DC solar water pump system that provides an environmentally friendly and sustainable water supply for years.
